The DHT11 Temperature sensor is one of the low cost and small-sized sensors of its types. It is lab calibrated, stable and its signal output is digital – best for DIY electronics project. It is highly reliable when it comes to temperature & humidity sensing technology. This sensor includes a resistive-type humidity measurement component and an NTC temperature measurement component and can connect to a high-performance 8-bit microcontroller. It’s single-wire serial interface and 4-pin single row pin package makes system integration easy and the best choice for various applications. The sensor converts the resistance measurement to humidity on the IC mounted to the back of the unit and transmits the readings directly to the Arduino.
Technical specifications:
- Humidity Measurement Range: 20-90%RH
- Temperature Measurement Range: 0-50 ̊C
- Humidity Accuracy: ±5%RH
- Temperature Accuracy: ±2 ̊C
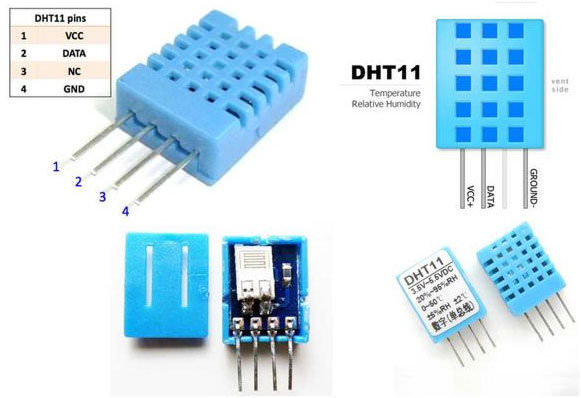
How the DHT11 measures the humidity and temperature:
The relative humidity is measured by the electrical resistance between two electrodes. The humidity sensing component of the DHT11 is a moisture holding substrate (usually a salt or conductive plastic polymer) with the electrodes applied to the surface. The ions are released by the substrate as water vapor is absorbed by it, which in turn increases the conductivity between the electrodes. The change in resistance between the two electrodes is proportional to the relative humidity. The below figure shows the electrodes applied to a substrate on the front of the chip.
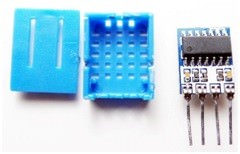
The sensor converts the resistance measurement to humidity on the IC mounted to the back of the unit and transmits the readings directly to the Arduino. The temperature readings from the DHT11 come from a surface mounted NTC temperature sensor (thermistor) built into the unit. The DHT11 uses one signal wire to transmit sensor readings to the Arduino digitally. The power comes from separate 5V and ground wires.
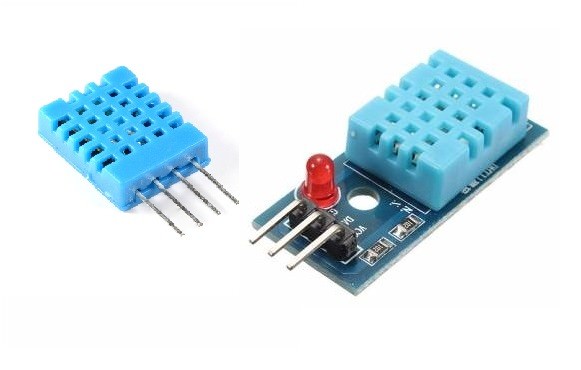
There are two different variations of the DHT11 sensor you might come across. One type has four pins, and the other type is mounted to a small PCB that has three pins. The PCB mounted version with three pins is nice since it includes a surface mounted 10K Ohm pull up resistor for the signal line:
Setting up Arduino with DHT11:
- DHT11 pin-1 is connected to 5v power supply pin on Arduino Uno
- DHT11 pin-2 is connected to digital pin-A0 on Arduino Uno
- DHT11 pin-3 is NC
- DHT11 pin-4 is connected to GND (Ground) pin on Arduino Uno
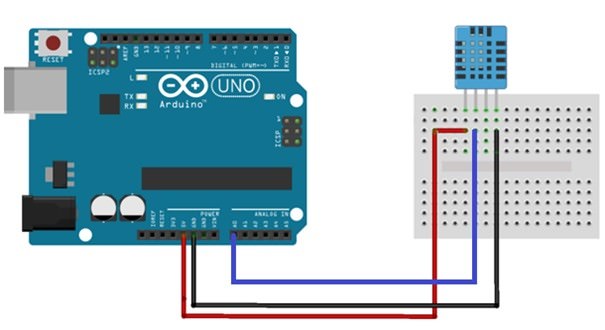
If the connection doesn’t work out you can add a 5K-10K Ohm resistor between 1st and 2nd pin of the sensor.
Now open “Arduino IDE” which you can download from Arduino.cc. From this website, you can download the IDE as per your Operating System.
The IDE will look like this:
Next,
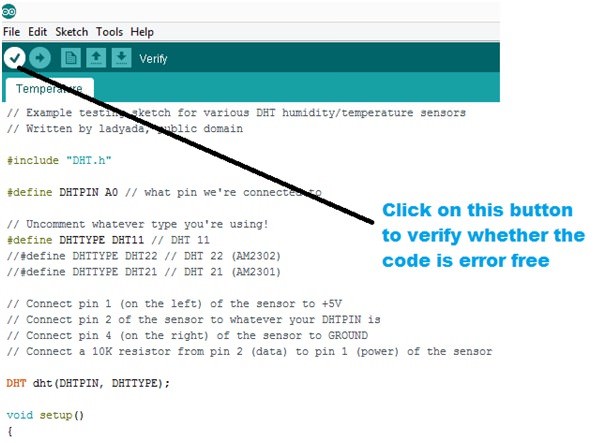
Later on,
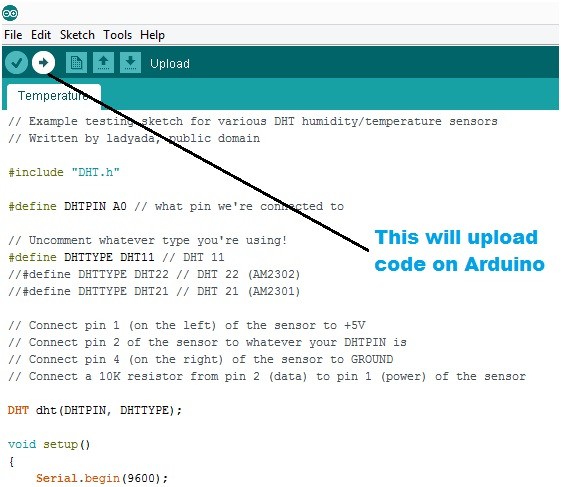
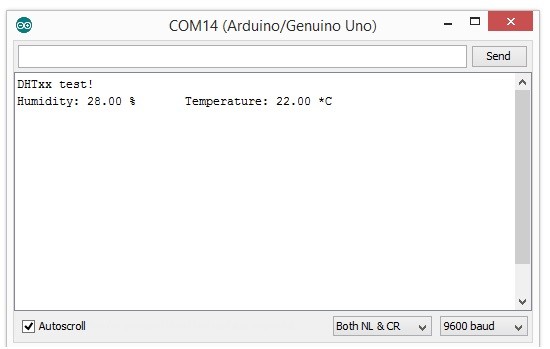
Finally, go to Tools > Serial Monitor —- It will show the below output.
The output:
For any queries contact us: Learn to build End-to-End solutions for the IoT.

